Installing Aircraft Repaints/Textures in Microsoft Flight Simulator X
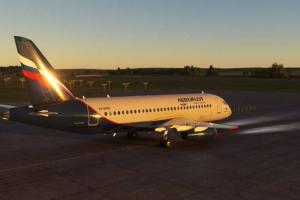
Creative addon textures are available all over the web. For this tutorial we are going to use repaints of the original Bombardier CRJ 700. This is the FSX Bombardier CRJ-700 Continental Textures repaint (by Charles Thorpe).
Similar to the aircraft installation tutorial in this series, we will be using Windows 7. Keep in mind that if you have a 64 bit Windows 7 (or 64-bit Vista) system the program files are located at:
C:\Program Files (x86)
It is recommended that you make a few adjustments before you start. Change the file settings so that “hidden files and folders” and file extensions are visible. Go to the Control Panel, click Appearance and Personalization, look under Folder Options and select “Show hidden files and folders.” Then click the View tab.
Look for “Hidden files and folders” and check the radio button “Show hidden, files, folders and drives.” Under that, uncheck “hide extensions for known file types.”
Another suggestion--keep downloads in a special folder—“My Downloads”, for example. Extract the zipped files in that folder and then copy over the FSX folders that you need.
First Step
Download the file above or a similar file. Texture addons will be in the form of a zip (.zip) or archive (.rar) file. Windows 7 has its own extraction method. Simply right click the file and select “Extract All.” Some people prefer to use third party programs like 7-zip, WinZip or Win Rar.
Occasionally .exe or .msi files are used by texture builders. These files will install immediately on launch. For that reason, use precautions like scanning the file beforehand with an anti-virus program.
Second Step
Inspect the contents of the extracted folder. There will be a texture.* folder as well as a few text and image files. FSX needs two components to run the texture: the texture.* folder and the specific code that goes into the configuration file called aircraft.cfg.
Double-check the readme file for any specific instructions. In this case, Charles Thorpe has put the special code for the aircraft.cfg file right in the readme file. This is the code:
[fltsim.x]

title=Bombardier CRJ 700 Continental

sim=Bombardier_CRJ_700

model=

panel=

sound=

texture=Cont

kb_checklists=BombardierCRJ700_check

kb_reference=BombardierCRJ700_ref

atc_id=C276L

atc_parking_types=GATE,RAMP

atc_airline=Continental

ui_manufacturer="Bombardier"

ui_type="CRJ700"

ui_variation="Continental Airlines"

ui_typerole="Regional Jet"

ui_createdby="Microsoft Corporation"

description="The Continental Airlines have never make a CRJ-700 so I wanted to make one. Also this is my first time I repainted an aircraft hope you like it!"
NOTE: The X stands for your number there are several sets of these in the config at the top they all have a number where the X is change the x for the last number in line
Example: [fltsim.3] if that was the last line this would be [fltsim.4]
Third Step
Make your way to the folder where the CRJ-700 is located. It should look like this:
Aircraft: C:\Program Files\Microsoft Games\Microsoft Flight Simulator X\SimObjects\Airplanes
By the way, if you are doing this operation for a helicopter, they should be put in the airplanes folder as well.
Find the aircraft.cfg file inside the aircraft folder. Using Notepad or similar text editor, open it. Every texture is designated with a specific description called [fltsim.x]. Copy the entire entry from the readme (or the file the author has written the special code) and paste it into aircraft.cfg.
Every [fltsim.xx] entry is for a different texture. You have to be careful here—note the number sequence. If there are entries for 0, then 1, then 2, your new entry will be next in line. Just make sure your number is one more than the last entry. This system makes sure each texture has its own number and there are no conflicts. The final entry will appear above the section marked [General].
Fourth Step
Next, copy and paste the texture.* folder to the folder of the designated aircraft, in this case the CRJ-700:
C:\Program Files\Microsoft Games\Microsoft Flight Simulator X\SimObjects\Airplanes\Bombardier_CRJ_700\
Launch FSX and navigate to the aircraft select menu. The new texture will be in the list. If you don’t see it there, make sure that “Show all variations” is checked. Enjoy your new texture!
Still stuck on this tutorial?
Ask Fly Away for an instant, step-by-step answer — installs, graphics settings, in-sim procedures and troubleshooting across MSFS, FSX, Prepar3D & X‑Plane.