How to install scenery add-ons in FS2004
One of the best features of the latest Microsoft Flight Simulators is the possibility to add almost an unlimited number of third-party add-ons such as new sceneries.
This tutorial tells you step by step what to do when installing an add-on scenery to FS2004.
- NOTE! These instructions are valid only when the scenery is packed in normal ZIP package. There can be also self extrating packages or installation programs, which are not covered by this tutorial.
- NOTE! FS2004 approves also add-on scenery intended originally for Flight Simulator 2002. Please note that although most of the FS2002 sceneries work in FS2004, you may encounter some problems - so use FS2004 scenery when available.
Installing FS2004 sceneries
- First we need to unpack the scenery files into Flight Simulator directory. Please consult the readme file of the scenery for any non-standard installation procedures.
- Open the scenery file in WinZip (or similar program). Extract the files to a directory of your choice. Flight Simulator's Addon scenery subdirectory is a good choice. Make sure you have Use folder names button turned on.
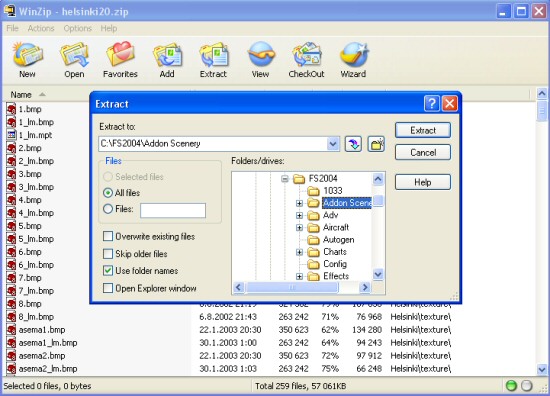
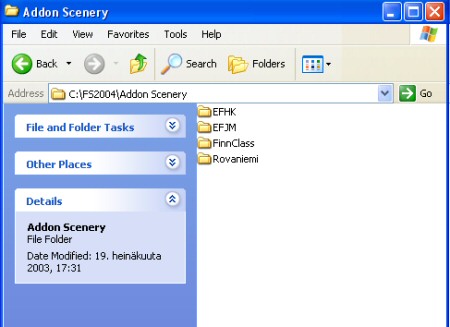
- Make sure you create a own subdirectory for the scenery you are about to install. All BGL files must be located in the scenery's scenery folder and all textures (.bmp etc.) must be in texture folder. For example: C:FS2004Addon SceneryEFHKscenery and C:FS2004Addon SceneryEFHK exture.
- Now start your Flight Simulator 2004.
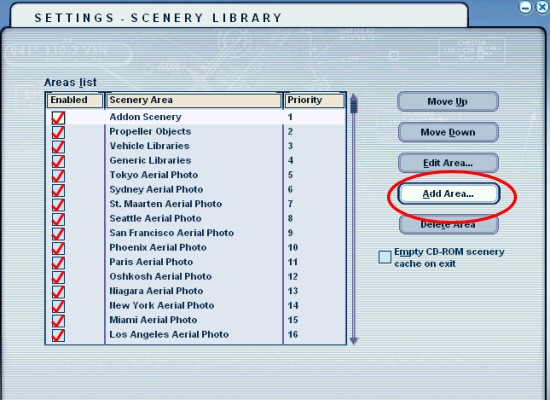
- Select Settings and Scenery Library from the main menu.

- In the Scenery Library menu, press Add Area.
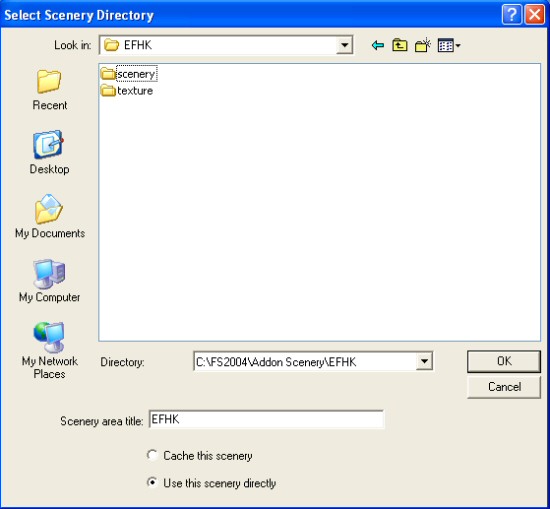
- Browse to the main directory where you unzipped the scenery files. For example: C:FS2004Addon SceneryEFHK. Amend the scenery area title if needed. Keep setting Use this scenery directly and press OK.
- The scenery now appears on the scenery library listing. You can use Move Up and Move Down buttons to move the scenery up/down in the priority layer listing, but for normal sceneries you can keep the default setting.
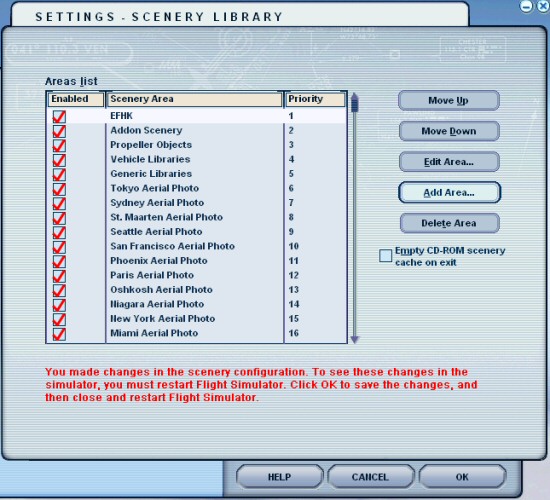
- Press OK and restart the Flight Simulator.
AI Assistant New
Still stuck on this tutorial?
Ask Fly Away for an instant, step-by-step answer — installs, graphics settings, in-sim procedures and troubleshooting across MSFS, FSX, Prepar3D & X‑Plane.
Get an instant answer Free preview · unlimited for PRO members