
 FSX AFCAD Files
AFCAD London Heathrow (EGLL)
London Heathrow International Airport version 2a includes some minor fixes to…
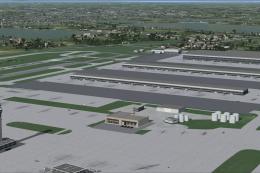
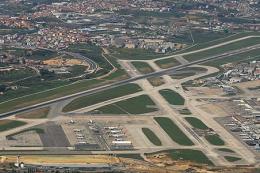
Tokyo Haneda International Airport (RJTT) gets an updated AFCAD for Flight Simulator X with optional crosswind runway operations to enable four-runway traffic flow or a default-style layout. It adds the runway 5/23 island, ILS for 23, the international terminal, A380-capable gates, expanded assigned parking, refreshed taxiways and signage, rebuilt service roads, extra ground vehicles, and improved tower views.
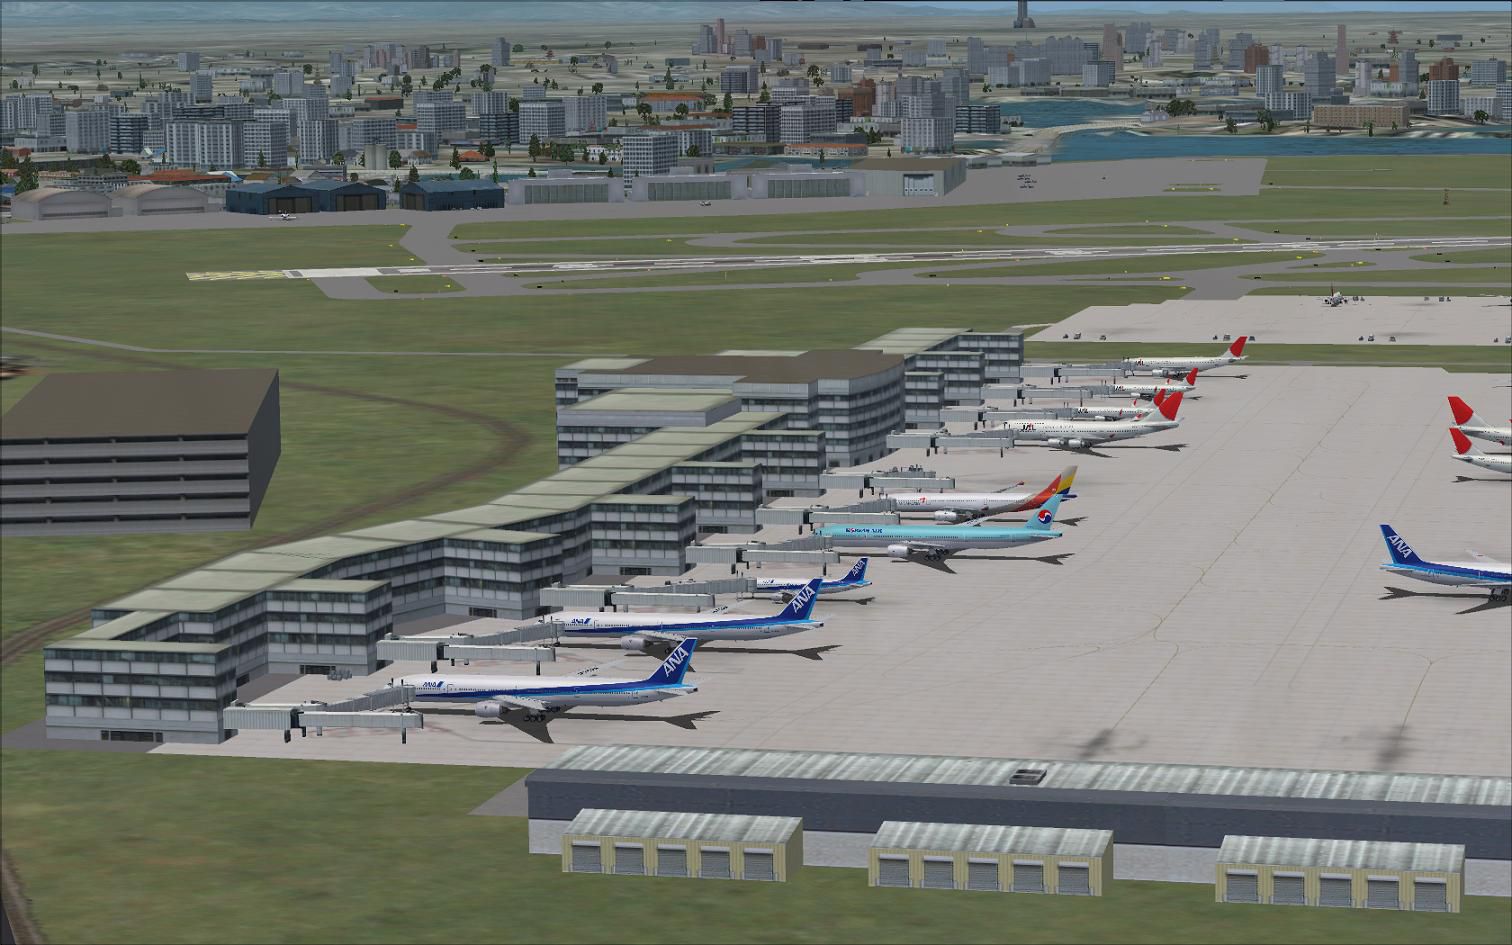
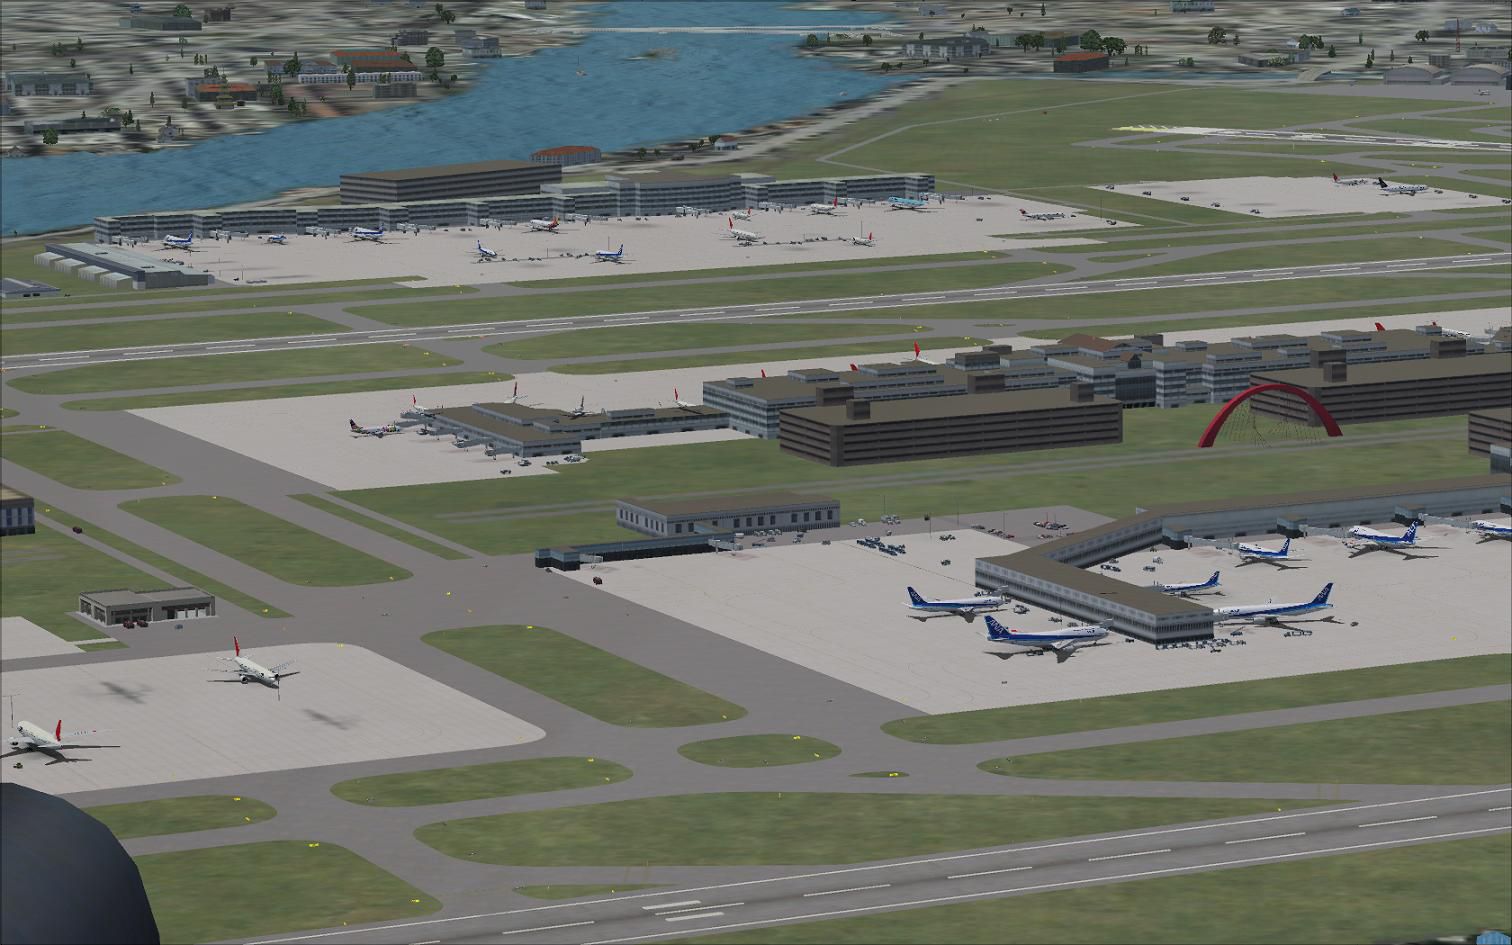
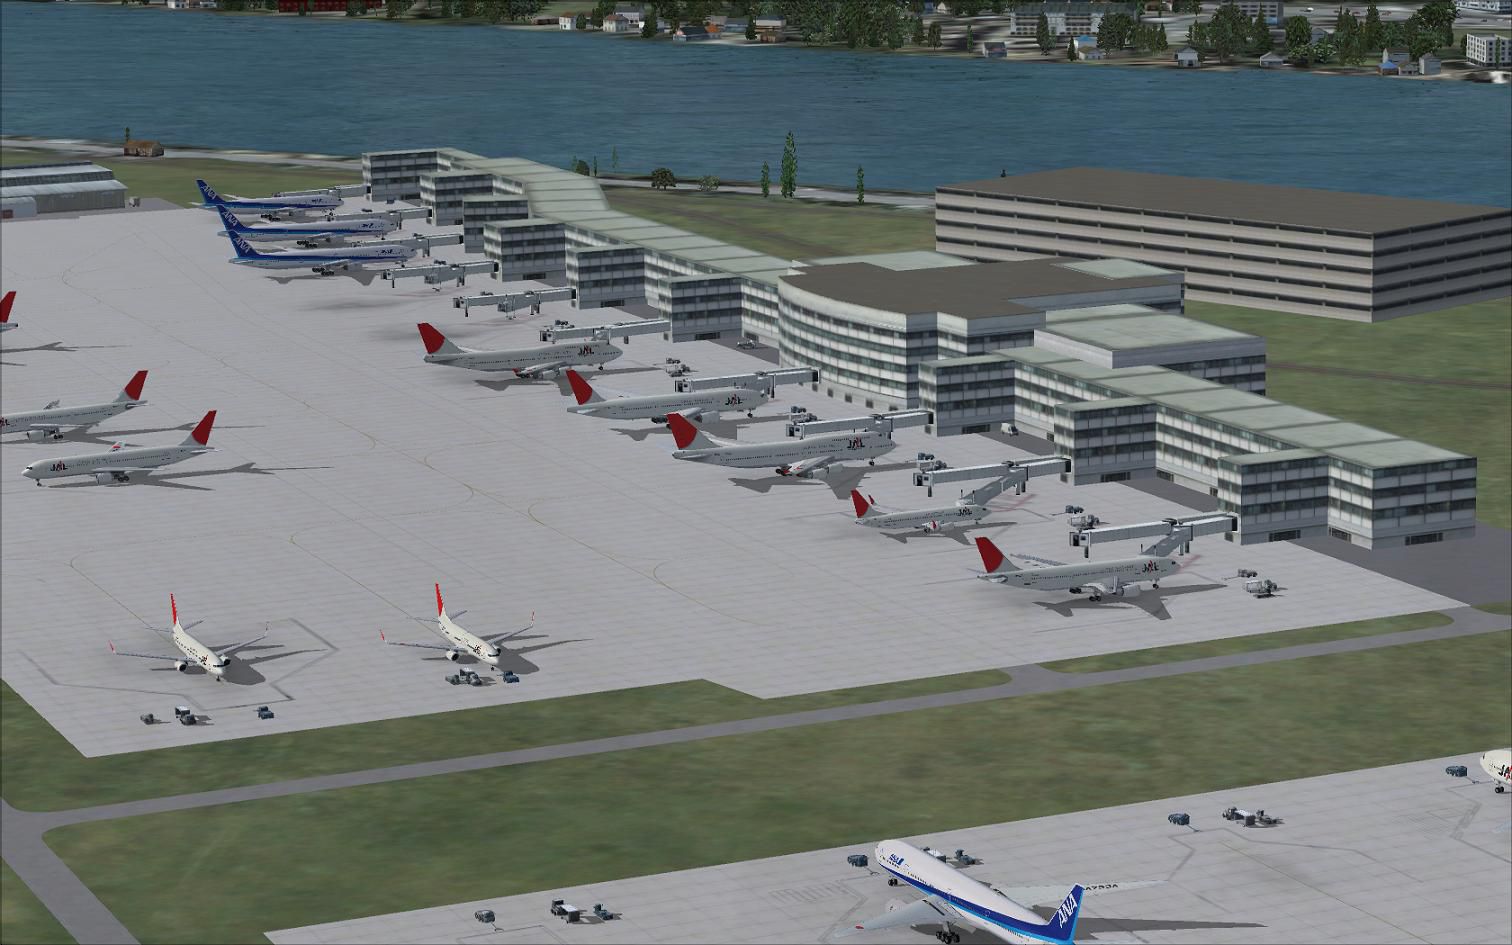
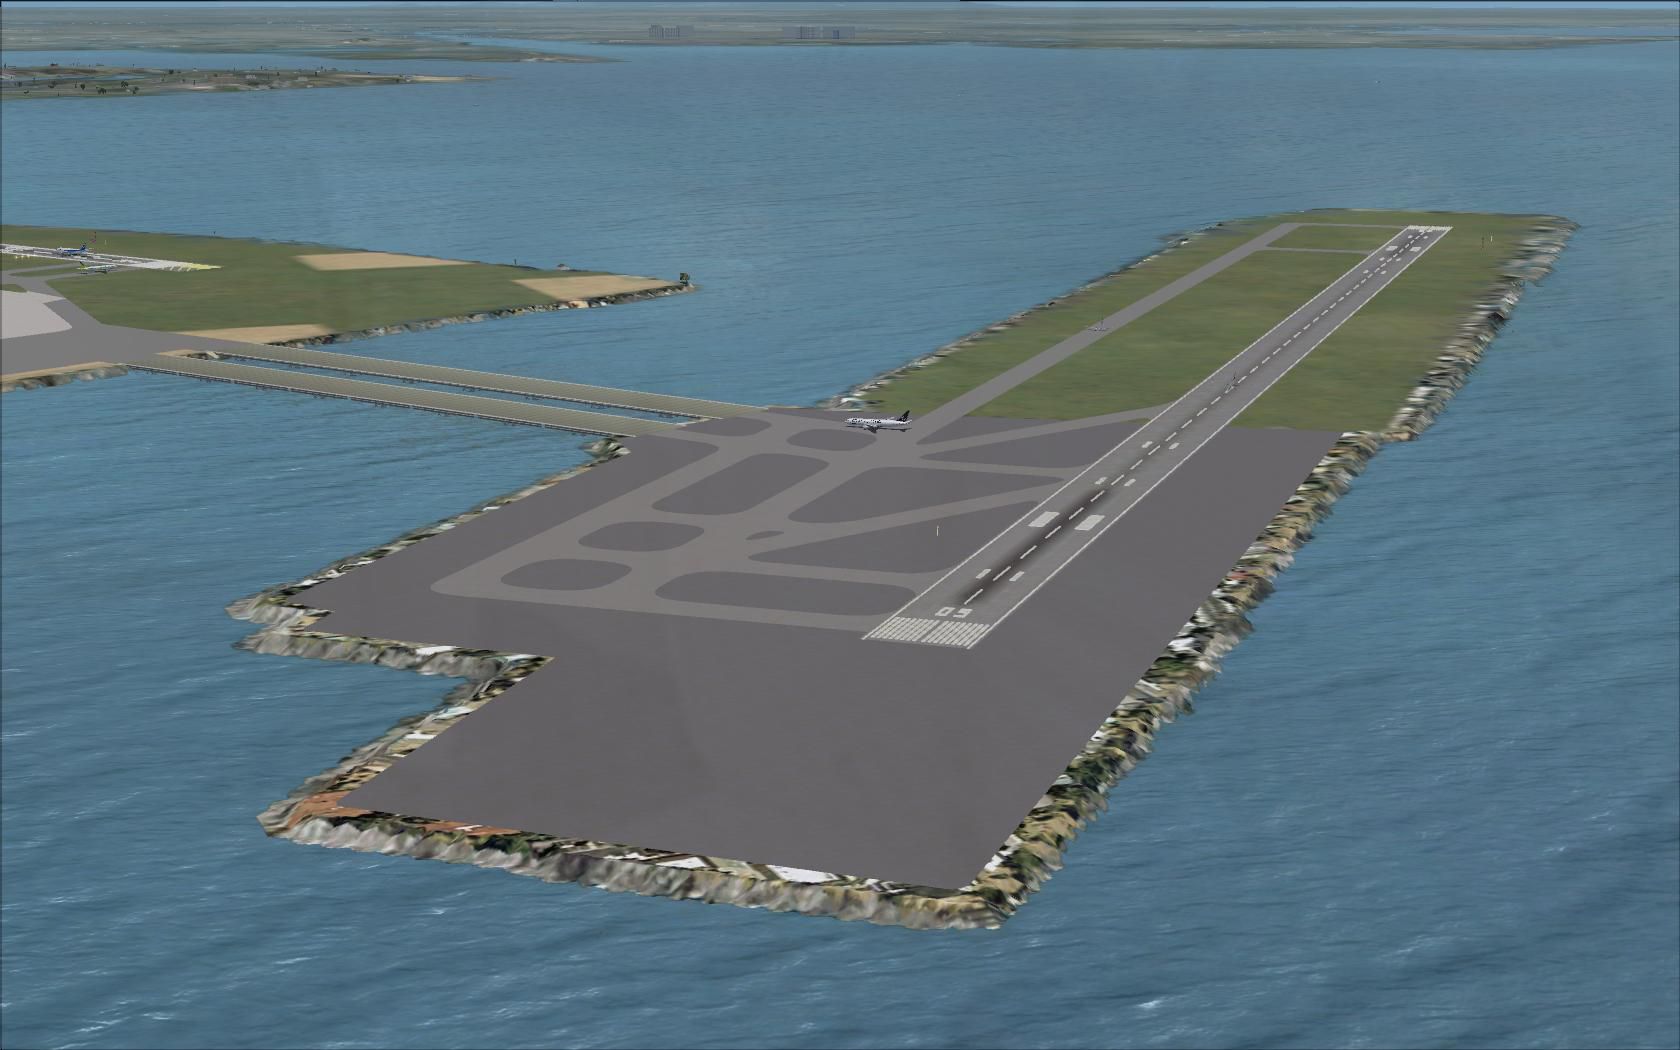
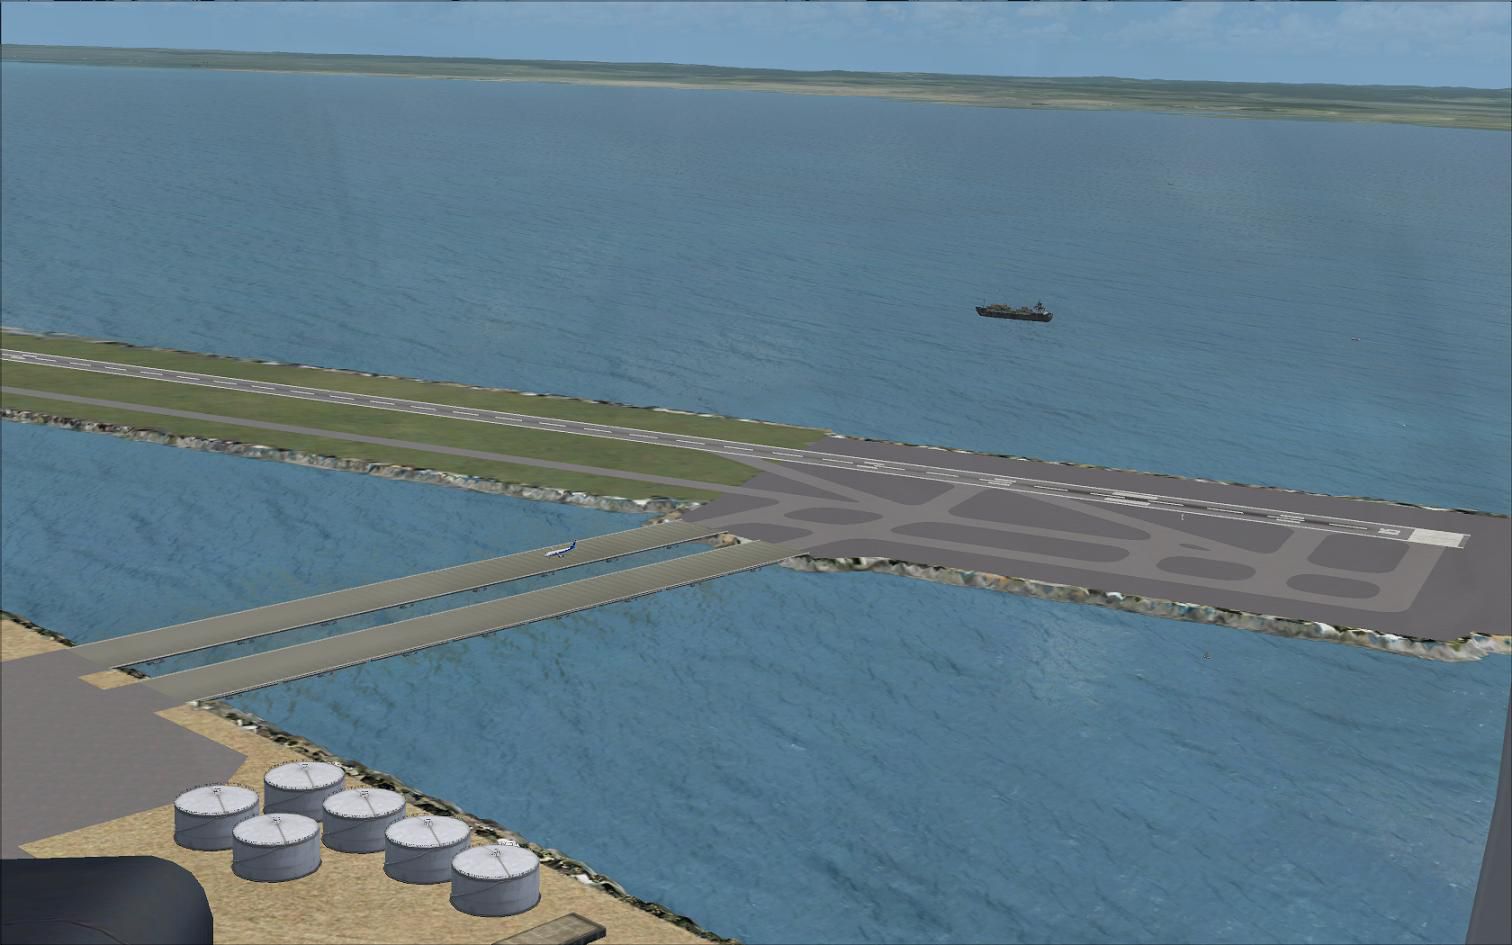
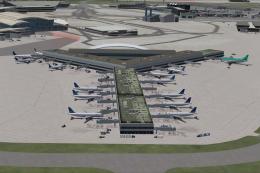
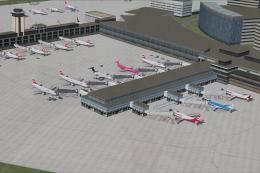
Tokyo Haneda International Airport, Japan. This airport update was designed with the latest version of ADE and made only for the FSX default airport. Includes one file with the crosswind runways operating, where all four runways will be used for takeoff/landing and another file as the default runway operation. The new island for runway 5/23 added, ILS also included for 23, the new international terminal added, assigned parking with extra parking, gates for the A380, all taxiways and taxi signs updated, extra fuel trucks, support vehicle roads rebuilt. Airport views are from the roof of the control tower (when in tower view). By Ray Smith.
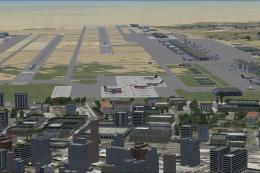
Aerial view Tokyo Haneda International Airport, Japan.
There are 2 folders:
The "Airport" folder contains 2 airport BGL files:
The RJTT_ADE_CW_RS.BGL file has all 4 runways in operation.
The RJTT_ADE_RS.BGL file is the same as the default 2 runway operation.
Do "NOT" use both files together, use only one or the other.
The "Scenery" folder contains 5 scenery BGL files.
To Install:
To Uninstall:
TIP: When at RJTT in tower view: go to your control settings and look for the "View track/pan Toggle" allocate a keyboard key stroke to it (i allocated a button on my controller) this will unlock the user aircraft, then you can use the hat switch to pan 360 degrees around the airport, hitting the key stroke again (in my case a button) will return you to the user aircraft position.
Enjoy and happy flying.
Ray.

Aerial view Tokyo Haneda International Airport, Japan.
Free for all simmers · 960.85 KB · Scanned clean Jul 2026
Download speed: Free tier is capped at 0.5 Mbps. PRO members download at full line speed.
AF2_*.bgl or AFX_*.bgl) go into FSX\Addon Scenery\Scenery\ or a dedicated AFCAD folder you create.readme.txt or README file. It tells you exactly where files go, what dependencies are needed, and any quirks specific to this add-on.Use these coordinates to fly directly to this location once the mod is installed.
35.54940000,139.77980000
Launch FSX or Prepar3D and use Flights → Load to open the downloaded .pln file. Your aircraft will be positioned at this location.
The archive rjtt_ade_rs_fsx.zip has 18 files and directories contained within it.
This list displays the first 500 files in the package. If the package has more, you will need to download it to view them.
| Filename/Directory | File Date | File Size |
|---|---|---|
| Airport | 12.16.11 | 0 B |
| RJTT_ADE_CW_RS.BGL | 12.16.11 | 231.38 kB |
| RJTT_ADE_RS.BGL | 12.16.11 | 230.72 kB |
| ReadMe.txt | 12.16.11 | 4.00 kB |
| RJTT.jpg | 12.13.11 | 159.14 kB |
| RJTT1.jpg | 12.16.11 | 128.39 kB |
| RJTT2.jpg | 12.16.11 | 189.06 kB |
| RJTT3.jpg | 12.16.11 | 170.30 kB |
| RJTT4.jpg | 12.16.11 | 170.49 kB |
| Scenery | 12.16.11 | 0 B |
| BRIDGES.BGL | 11.17.11 | 612 B |
| Bridges_LC_8519.bgl | 11.15.11 | 327 B |
| CVX_RJTTIsland.BGL | 11.16.11 | 1.41 kB |
| RJTT1_ADE.BGL | 11.17.11 | 537 B |
| RJTT_ADE_CVX.bgl | 12.15.11 | 719 B |
| FSX_rjtt_ade_rs | 12.16.11 | 0 B |
| flyawaysimulation.txt | 10.29.13 | 959 B |
| Go to Fly Away Simulation.url | 01.22.16 | 52 B |
Only PRO members can place votes.
More FSX & P3D add-ons hand-picked based on this download.
FSX AFCAD Files
London Heathrow International Airport version 2a includes some minor fixes to…
 FSX AFCAD Files
This pack includes every single AFCAD package released by Smith Graphics for …
 FSX AFCAD Files
Elevate Microsoft Flight Simulator X with a refined rendition of Lisbon Inter…
 FSX AFCAD Files
John F. Kennedy International Airport, New York, NY, USA, v2. This airport up…
 FSX AFCAD Files
This enhanced AFCAD file updates the runway numbers at Princess Juliana Inter…
 FSX AFCAD Files
Dubai International Airport, United Arab Emirates (UAE). This airport update …
 FSX AFCAD Files
Los Angeles International Airport (LAX), California (CA), USA. This airport u…
 FSX AFCAD Files
This freeware package modernizes Zurich International Airport (LSZH) in Micro…
Read what other simmers think, or add your own.
Tried the RJTT and followed instructions but aircraft cannot taxi over bridge to rwy 5/23. they just crash down. It does not look like bridge is connected to taxi way. FSX Steam