 FSX Panels & Gauges
2D Cabin Window/Wing View Panel
For use with wing views in FSX. As we all know, FSX doesn't provide this func…
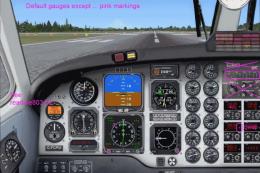
Transavia PL-12 Airtruk 2D panel brings a photo-referenced cockpit layout to any AirTruk model in FSX, using carefully selected default gauges to match the aircraft’s utilitarian agricultural style. It includes authentic instrument choices, with a couple of Robinson R22 gauges for extra realism and requires the Robinson_R22.cab file.
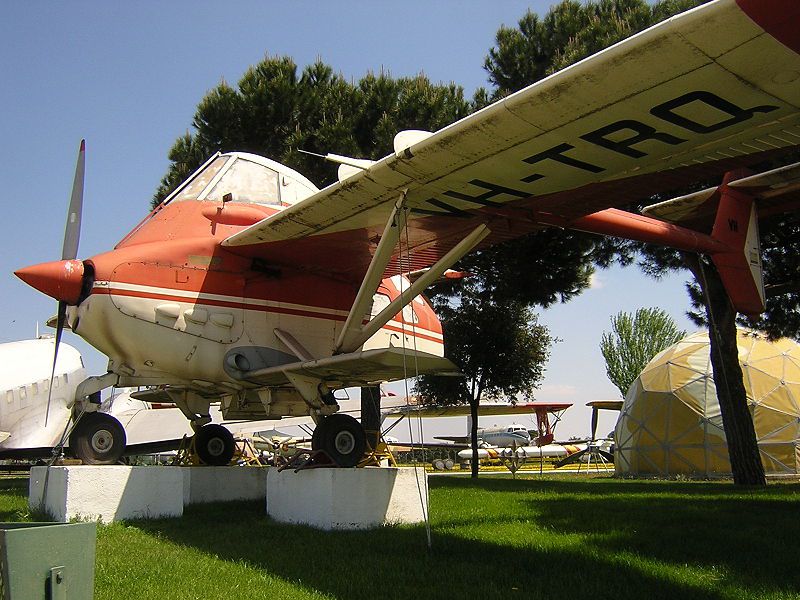
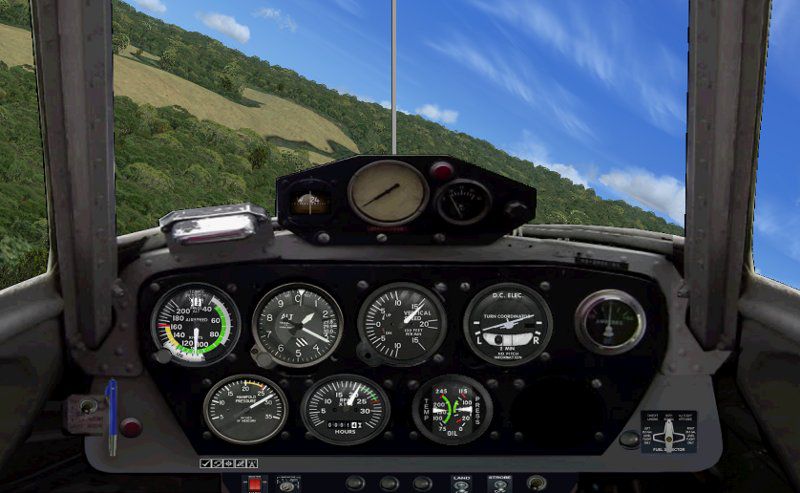
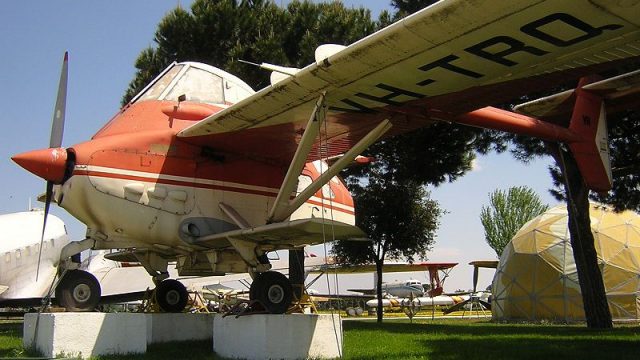
2D Panel For The Transavia PL12 AirTruk. This panel is based on photographs of real AirTruk aircraft cockpits and can be used as a 2D panel in conjunction with any AirTruk model. Gauges are all default FSX but chosen to represent the style of those found in the aircraft. The Transavia PL-12 Airtruk is a single-engine agricultural biplane aircraft designed and built by the Transavia Corporation in Australia. By Dean Stringer.

2D Panel For The Transavia PL12 AirTruk.
This panel is based on photographs of real AirTruk aircraft cockpits and can be used as a 2D panel in conjunction with any AirTruk model.
The Transavia PL-12 Airtruk is a single-engine agricultural biplane aircraft designed and built by the Transavia Corporation in Australia. The Airtruk is of all metal construction with the cockpit mounted above a tractor engine and short pod fuselage with rear doors. It has twin tail booms with two unconnected tails.
To retain something of the original feel of the gauges typically seen in an AirTruk two of the gauges have been borrowed from the default FSX Robinson R22 helicopter. For this panel to work correctly you must complete all of the following steps:
1. PANEL INSTALLATION
* copy the folder "panel.dno" into your AirTruk folder under the main FSX airplanes folder
* edit your AirTruk aircraft.cfg file and change each aircraft entry to specify the new panel in the following way
panel=dno
2. GAUGE INSTALLATION
* copy the file Robinson_R22.cab from the following folder into the new panel.dno folder created above:
\SimObjects\Rotorcraft\Robinson_R22\panel
Re-load your AirTruk and you are away.
All other gauges are taken from default FSX Cessna 172/182 gauges and should not need to be configured by you.
Good luck, hope you enjoy using the panel.
Free for all simmers · 659.25 KB · Scanned clean Jul 2026
Download speed: Free tier is capped at 0.5 Mbps. PRO members download at full line speed.
FSX\SimObjects\Airplanes\{aircraft}\panel\. Back up the existing panel folder first.readme.txt or README file. It tells you exactly where files go, what dependencies are needed, and any quirks specific to this add-on.The archive airtruk-panel.zip has 9 files and directories contained within it.
This list displays the first 500 files in the package. If the package has more, you will need to download it to view them.
| Filename/Directory | File Date | File Size |
|---|---|---|
| panel.dno | 02.23.11 | 0 B |
| 800px-Airtruk.jpg | 02.21.11 | 117.64 kB |
| main.bmp | 02.23.11 | 2.25 MB |
| panel.cfg | 02.23.11 | 2.32 kB |
| README-INSTALL.txt | 02.21.11 | 1.92 kB |
| screenshot.jpg | 02.23.11 | 71.24 kB |
| thumb.gif | 02.23.11 | 14.28 kB |
| flyawaysimulation.txt | 10.29.13 | 959 B |
| Go to Fly Away Simulation.url | 01.22.16 | 52 B |
Only PRO members can place votes.
More FSX & P3D add-ons hand-picked based on this download.
FSX Panels & Gauges
For use with wing views in FSX. As we all know, FSX doesn't provide this func…
A photorealistic 2D panel for the Dan Cownan Icon A5 (A5.ZIP). Contains all n…
 FSX Panels & Gauges
Designed from a real photo as replacement for the default FSX C208. XML gauge…
 FSX Panels & Gauges
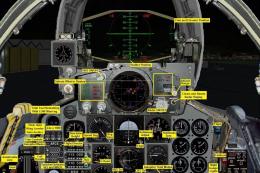
F-4 Phantom 2D Panel. Photo-based F4 Phantom II panel. Includes a complete su…
 FSX Panels & Gauges
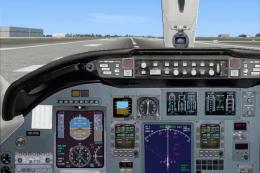
Citation Excel 560XL 2D Panel. Based on the Aryus FS2004 model but flying ver…
 FSX Panels & Gauges
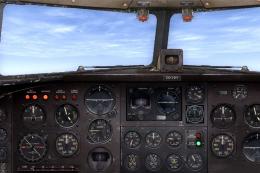
Douglas DC-3 Widescreen 2D Panel. Original DC3 2D panel extended for use with…
 FSX Panels & Gauges
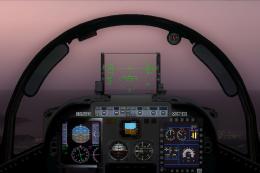
A 2D panel for Tim Conrad's Super Tucano now extended for use with widescreen…
 FSX Panels & Gauges
Based on the default Beechcraft King Air 350 with modified bitmap, default FS…
Be the first to leave a comment on this download.
Be the first to share your thoughts on this download.