Concorde X v1.3 Released for FSX/FSX:SE/P3D
Concorde X v1.3 from Flight Sim Labs is officially released for FSX, FSX:SE, and P3D, delivering refined 2D and 3D panels, improved flight…
In this review, we’ll be taking a look at the Victa Airtourer, an aircraft with a huge amount of history and prestige. The information and opinion gathered in this guide came as a result of both research of the real aircraft, comparisons with the specifications provided by the developers, and personal opinion over several hours of usage.
So, after more than enough flying to get used to the aircraft, what did we make of the Airtourer?
As an aircraft with no shortage of style or “cool” the Victa Airtourer won many awards for its design and performance quality. It won the 1953 Royal Aircraft Club light aircraft competition, one of the crowning moments for this particular model.
However, the aircraft itself never took its first forays into the skies until 1959, when it was completed. Before long, the aircraft started to draw envious glances from other flight schools and eventually it had an interested party in taking development over.

Airtourer in flight
The person interested was one Mervyn Victor Richardson, of Victa. Whilst they tended to be known for making quality lawnmowers, they took on the development of the aircraft and put it into production as an all-metal aircraft.
The first all-metal prototype flew for the first time in 1961, and in 1962 was the first Australian-based aircraft to be given type approval. Unfortunately, success was short-lived as by 1966 the American import cuts were causing havoc in the Australian market. Failure to get government protection from this scheme meant that production had to stop.
It was sold on to Aero Engine Services Ltd, a company in New Zealand. Production continued again until 1971, when production finally ceased for good. Even today, though, the aircraft retains an air of popularity with those who got a chance to use the aircraft in the past. With more than 205 aircraft made across the various styles, it became an aircraft appreciated for training and touring providing it with some usefulness.
So, in this package plenty of detail has been stuffed in for good measure. When you start this package up, then, you should be getting a fair amount of content to play around with. This recreation tries to put in every addition that it can, including awesome extras such as;

Cockpit at dusk
To help you better understand the kind of aircraft that you will be using, this should help you fully understand the aircraft. the specs that it uses includes;
Specifications:
Cruise Performance:
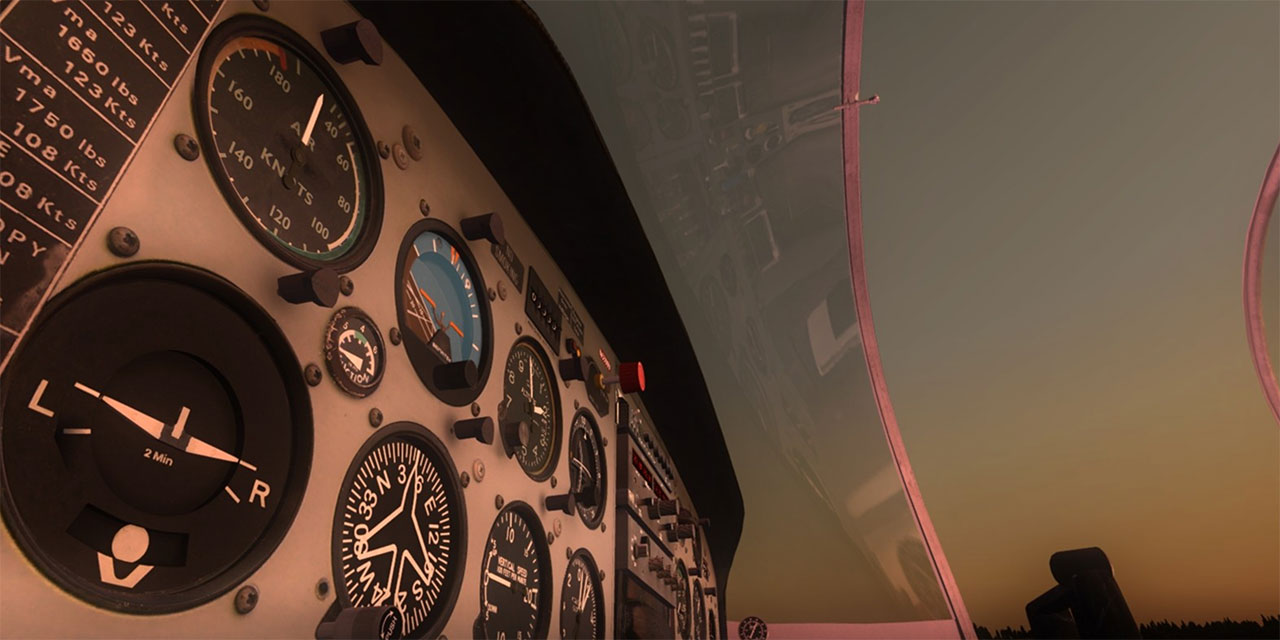
Cockpit guages up close and also showing glass canopy reflective feature
The first thing that I noticed immediately upon getting this product accessible was just how easy it was. Some mods can feel like a fight to the death to get it working right, but this offered little to no issues. If you have been using other Orbx products in the past, then you don’t even really need to read this section – you know yourself how easy it is!
Once you have completed your purchase, you will need to go to the e-mail you provided to get your download link from the FSS. You’ll also have key information such as the Order Data, Order Number and your Registration Keys. Take note of all of these. Download the file and unpack it, and then run the “Wrapper” provided. Once open, select Online Activation and enter in your registration details from your e-mail, and hit “Next”.
Read the information provided, agree to the License Agreement and then select the simulator that you will be using this with. If you want both FSX and P3D then you install it to both at once with the one license. You might need to tell the Wrapper file where to find your FSX, so be prepared to do some navigating to hunt it down if you are unlucky enough to be asked.
Once ready, hit “Next” and let the installer do its job. You simply sit back and wait for it to create the right documents. You’ll also get two sets of documentation left behind, too; a User Manual and also an Operating Handbook. These provide more details about the Airtourer systems, and general operation.
Not sure if this is for you? Then you can download both manuals off the website free of charge before you start using the hardware. This is useful, as it allows you to know if this is going to be the right pick for you or not.
By the way, I got a specific notice when installing this and you might too. you may be asked to give permission to run Orbxsound.dll as a trusted file. If you have other Orbx kits you have already done this but since I was using a fresh installation, you’ll need to confirm this.
Overall, installation really could not have been any simpler. I was hugely impressed with how easy it was to get working, and would say that out of all the installations I manage regularly, Orbx is arguably the simplest.
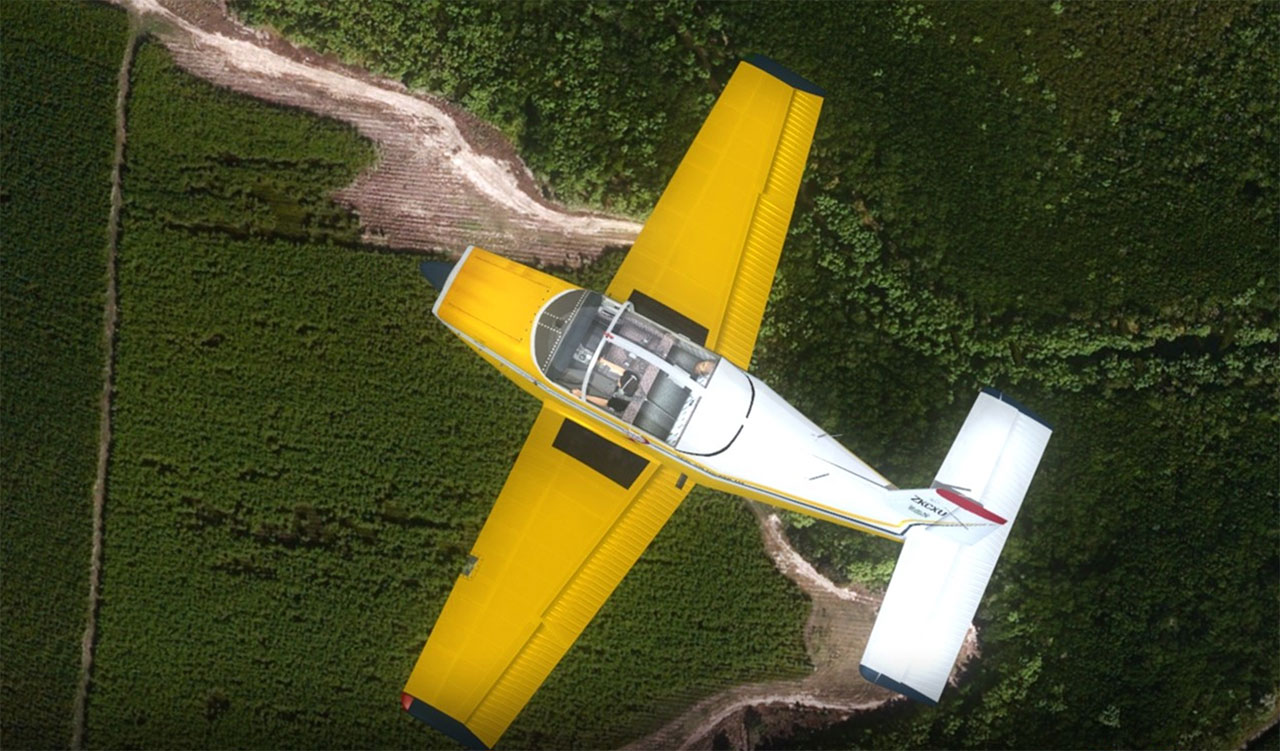
?Yellow paint scheme - show from above.
Like any good Orbx model, this looks great on the inside. The work that has been done on everything from the seat covers to the little dinks and dots on the metal across the aircraft adds such a nice little touch. You’ll get to immediately feel at home thanks to the nice cloth seating that is well textured and looks the way it should, avoiding the drab and dull textures many interiors get hit with.
The best part of the interior design is the fact that it uses so many of the small quirks. It shows you an aircraft that has actively been used – I hate the pristine look that many models come with. It’s as if you are the first person to step foot on that model, every single time. This, though, changes that and makes the aircraft look authentic.
Many smaller things were included that really goes a long way to making the whole thing feel fun to be a part of. A major part of the aircraft that I enjoyed making use of, though, was the storage areas. I spent a long time rifling through them to see what was here – from little books stored down the right-hand side to the well-marked storage areas, this does a great job of making the aircraft feels as busy as it should.
If you find it hard to see what you are doing, then you can use the brightness panel to make the inside of the aircraft a little less dim.

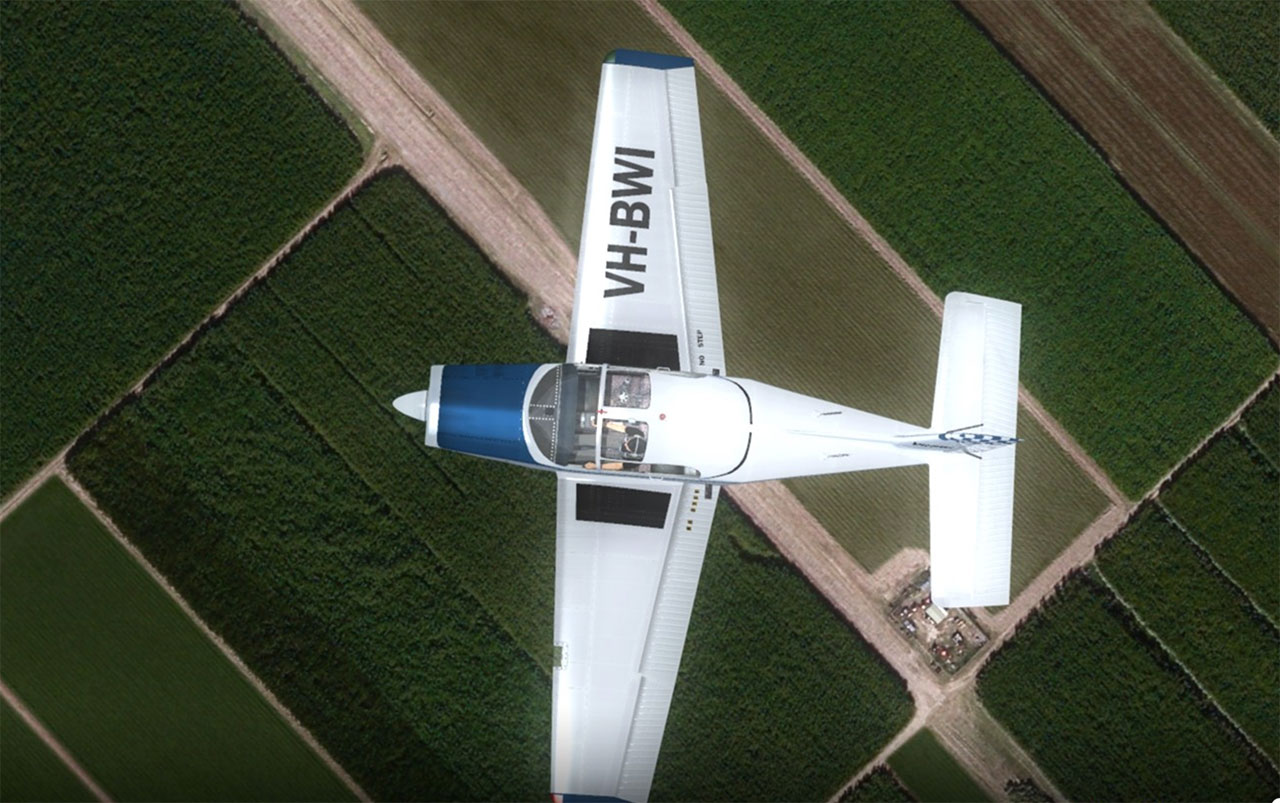
Blue and red color scheme as shown from above.
The most important part of any aircraft, though, is the function. The cockpit that is being used in this aircraft is awesome. Not only is the overall detailing in the textures just sublime, but it feels so easy to work as well. One thing that I really appreciated was the extra mile gone when it come to the usage of the aircraft. this looks like it has been used, a lot, not as if it just out of the packaging!
Another awesome feature is the inclusion of the window reflections – these are very well done and it makes sure that the final touches in presentation shine through. However, the most important factor has to be the actual instruments that you can work with.
For example, the top left section of the instruments includes your primary tools. It’s also got things like instrument panel brightness adjustments and Vacuum Pressure gauges. Each part of the left-sided sector works just right and provides you with easy function of main features like Assigned Altitude. Just beware of the knobs – they can spin a little “too” easy. Also, please keep in mind that this aircraft uses a side throttle control instead of being alongside the propeller controls. This might take a little getting used to.
Another instrument I want to touch on also is that of the interior tool braking system. It uses a brake handle to the left of the lights, rather than a pedal. It’s very easy to use but at first its more than likely to be quite confusing for you if you have never flown like this before. Also, this actually includes a Carb Heat switch which many don’t, needing to be implemented using a keyboard shortcut instead. This saves a lot of time and patience, for sure.
In terms of braking this also has a different park braking system to use. This use an up/down lever system over the usual push/pull system most aircraft would be using.
Find the cockpit too bright? Then use the dimmer switch – this is useful when playing in the darkness. Moving towards the central instruments and you have the GPS (which can be installed separately) alongside the radios, propeller and mixture controls. Between the seats is the Master Battery, the Alternator and the Avionics control.
On the right side we have the audio switching panels as well as the easy comms/nav switch buttons, which are huge. Alongside this is the IDENT nob and some other fittings such as CP 135 TSO systems. Towards the bottom of all this hardware is the Bendix KY 96A TSO secondary comms radio. It’s a nice touch and you can actually stay in communication whilst using COM1 to stick to the ATC.
As ever, the manual does an exceptional job of breaking down all of the best features and greatest strengths of the cockpit. Safe to say, though, that it manages to cover just about everything you would expect – it’s authentic to the last detail.

Flying over airfield
One of the major instruments included with this, though – and one that deserves its own section – is the GPS. This model comes with a new GPS system that is far more powerful than the dreary and dull FSX default. If you don’t have a good GPS system that you already use, then you can make the most of the one included with this – a Garmin GPS 296 system. It’s a well-working GPS that come mounted to the instrument panel, giving you plenty of control. If you are a rookie to using a GPS system, then check out the included manual – it’s about as inclusive an education as you are likely to get.
There’s a small power button to turn it on/off. However, I would like to note that this the navigation data cycle system that is displayed on the screen when first turned on about the data of the database is wrong. It uses the default FSX database.
You get various layouts to pick from but arguably the best is the Map layout. The majority of this GPS is a large display screen with all of the functions towards the right of the design. You get the same old display functions for Ground Speed, Aircraft Track Heading, Altitude above MSL and also the Distance to the next waypoint. If you hit ‘Page’ then you move between each of these sections.
One of the pages worth looking into is the Position Data page. This gives you data from all the other screens without the map intruding, but also gives some useful details about local sunrise/sunset times and the battery level for the GPS itself. However, the battery level stays the same regardless. If you are used to the majority of premium GPS programs then this is a piece of cake to work and operate, for sure.
When it comes to making a flight plan, you have a few options to use. You can open default, generic flight plans and you can create flight plans on the Active Waypoint system. The AW system is the easiest to use without a doubt, and makes it easy to set up direct-to flights without much challenge. Once you highlight the airport code you want to go and fly to, hit Enter and load more details about the destination.
You can also just load an approach into the GPS and work with that. I did find viewing the GPS a little tough at first but, eventually, I got used to how it works. You might need to adjust your view a few times to get the perfect view, but it’s not very difficult to get right.
My only complaint would probably be the lack of visibility at times on the screen. It’s a challenge to get used to and usually meant I spent more time than I wanted adjusting and scrolling through various numbers and letters to find the airport I wanted without much visibility provided.
That aside, though, the GPS provided here works extremely well.
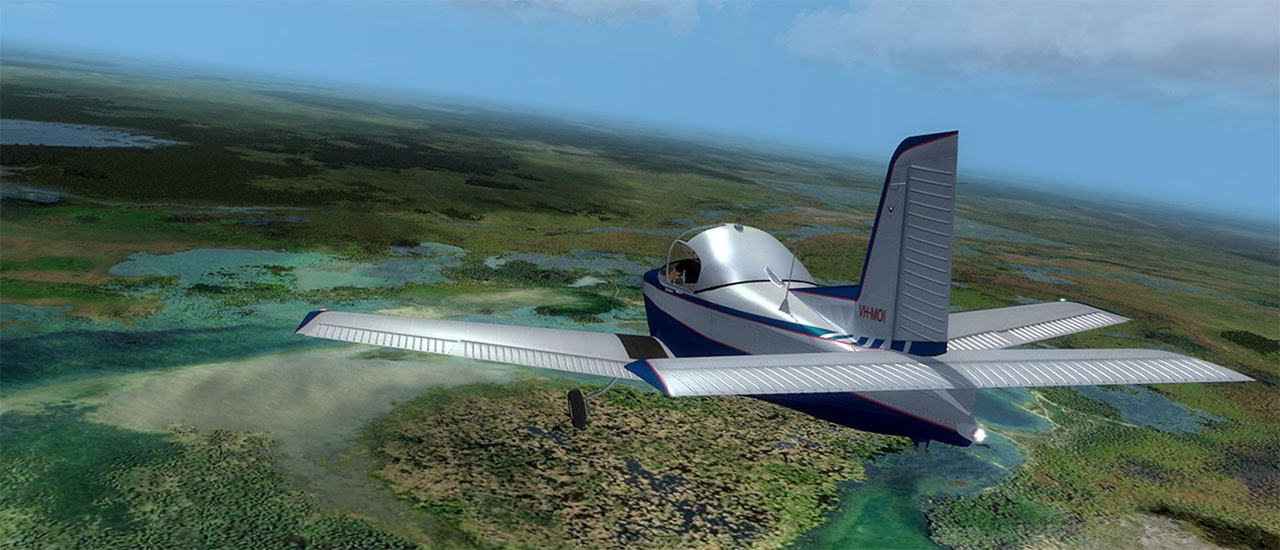
The Victa Airtourer flying over swamp land.
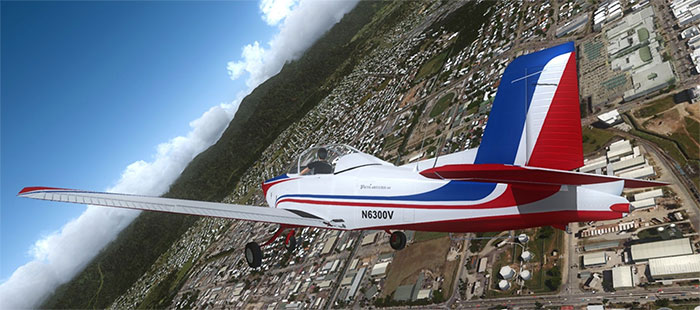
The exterior, too, is very well done – it’s in-scale and carries a lot of interesting little quirks and features. Many aircraft like this can tend to feel a little weak in terms of realism, especially for vintage models like this, but no such slacking made it through here!
You can change exterior view options to make this more/less balanced in terms of the design details. If you are using a lesser machine, then this will help you sort that out relatively quickly – just reduce the level of detail and you should notice your framerates become a little more consistent.
Nice little add-ons such as the pilot being include or removed on request to many smaller objects and functions. For example, the panel-mounted GPS from the control panel provides an easy way to control the aircraft from an external view as well.
Also, you get to pick between a male and female pilot on installation and that shows through in the exterior design. The quality of the overall design should not be overlooked. The attention to detail is very impressive, as is the quality of the textures. Throw in the animated control surfaces and wing features and this feels alive!
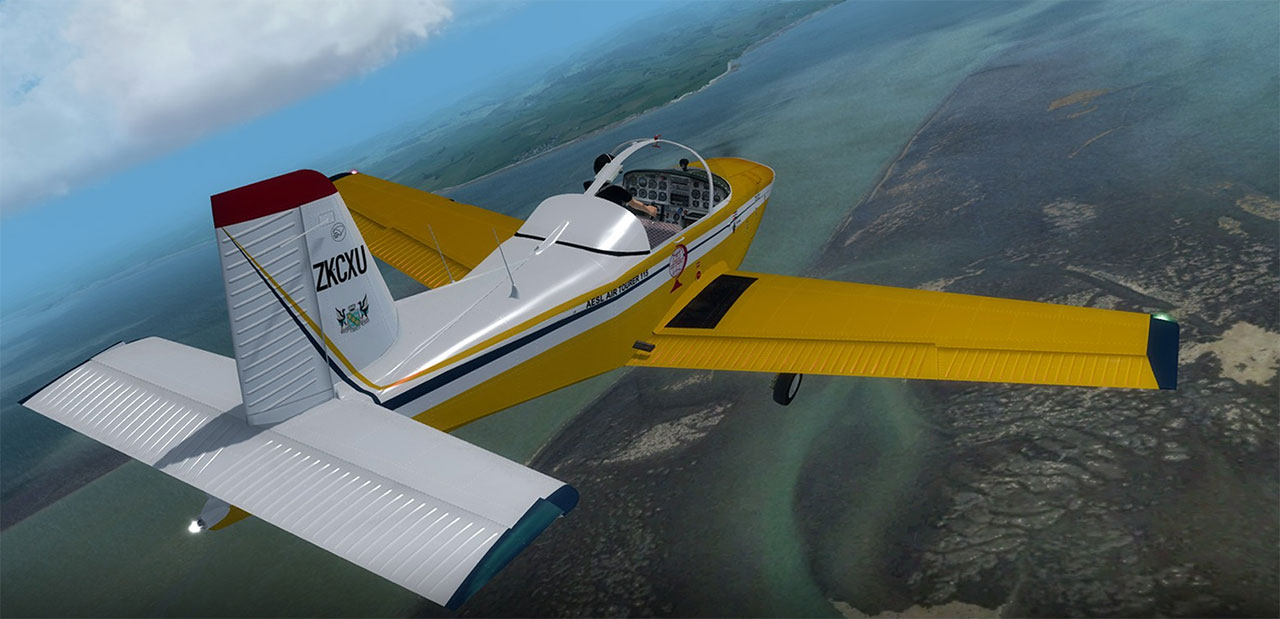
The Airtourer flying over a river
When I started this up for the first time I was pretty impressed by the level of detail and realism that shines through – especially in the checklist. The checklist made it easy to get this running nice and smooth in no time at all. It also ensures that I could, as part of the Pilot’s Operating Handbook, understand why I was making certain decisions on the checklist as opposed to just making them.
Starting up the aircraft is nice and easy, as is getting used to the way that it flies. The dynamics are sound, the instrument panels come with primer levels and the After Start checklist makes it easy to put all of those features to good use. In terms of selling the overall flight experience to you, this does a rather exceptional job.
The aircraft is nice and responsive, dealing with every request I made as I made it – no delays or lags here. I would recommend, though, doing all of your planning for the flight before takeoff as this can be a little bit of a handful to try and do as you fly!
One thing I would also say is that whilst this does come with a cruise function, it really is a cruise. There is no great associated speed with cruising using this, with around 110-115KIAS at 24” and around 2,400RPM. It’s good for sightseeing, though, and for flying over and checking out those new scenery packages that you may have installed.
The main feature missing is the lack of an autopilot, but having to fly manually should not be a burden at all. I loved learning with this aircraft, having been so long since I had to do a whole flight on my own – from an educational perspective, though, it was a very gratifying experience.
Flying over fields
I only have good words to say about this aircraft. The aircraft itself is a well-known piece of kit but not many will have had the chance to fly one, real or simulated, today. This modification adds a nice touch of experimentation to your simulator.
I found that the lack of classic aircraft to pick from when I first got into simulation was one of the biggest letdowns. Over the years, packages of the quality this provides have been released time and time again, offering a wonderful way to solve that lack of realism.
Now, I can enjoy vintage models such as this detailed to the highest level of performance and design. If you are like me and you enjoy being in the cockpit of an aircraft from the past, and you like to see it done well, then this is very much an aircraft worth picking up.
This aircraft model is compatible with FSX Original, FSX: Steam Edition and all versions of Prepar3D.
You can view more information over at the official Orbx website here.
Upgrade Microsoft Flight Simulator, FSX, P3D & X-Plane in minutes with our curated file library packed with aircraft, scenery, liveries, and utilities.
Ready to upgrade your hangar?
Browse the free file library
Ian Stephens is a flight simulation industry expert with over 20 years of experience and also has a keen interest in aviation and technology. Ian spends a lot of his time experimenting with various simulator packages but has a love for Microsoft Flight Simulator X because of the huge selection of add-ons available. However, Ian also has copies of Prepar3D and X-Plane installed.
Ian has been writing for Fly Away Simulation for over 9 years. Should you wish, you can contact Ian via email at ian.stephens@flyawaysimulation.com.
Concorde X v1.3 from Flight Sim Labs is officially released for FSX, FSX:SE, and P3D, delivering refined 2D and 3D panels, improved flight…
Immerse yourself in a refined selection of freeware Boeing 747 expansions tailored for FSX, FSX:SE, and P3D, designed to boost flight…
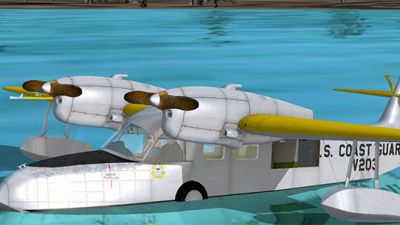
Experience the freshly unveiled Flysimware G-44A Widgeon, a meticulously crafted amphibious aircraft saluting its WWII patrol heritage with…
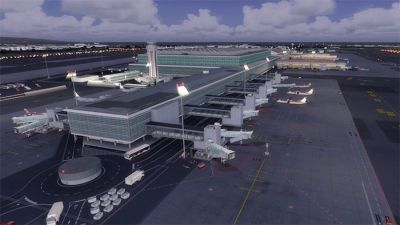
Aerosoft’s brand-new Malaga X Scenery transforms Spain’s bustling Costa del Sol airport into a high-fidelity virtual environment,…

Just Flight has rolled out a high-fidelity de Havilland DH.98 Mosquito FB Mk VI module for FSX, FSX:SE, and P3D, featuring historically…
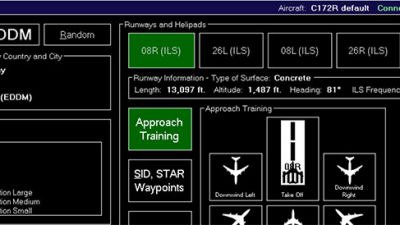
Experience a dynamic approach to flight simulation with FS-FlightControl, compatible with FSX, FSX:SE, and Prepar3D, giving you enhanced…