 FSX Scenery
Birmingham Int'l Airport
Birmingham Int'l Airport UK. This is an update to the scenery of EGBB. Change…
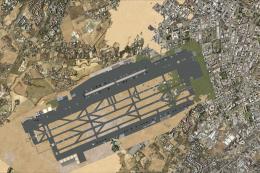
Birmingham International Airport (EGBB) for FSX replaces the default field with a January 2008 layout, including remote stands 20–25, taxiway C, and the former 06–24 runway repurposed as a taxiway while retaining period markings. It blends cleanly with Horizon VFR Photographic Scenery Generation-X yet runs well on the default simulator.
Birmingham International Airport (EGBB), UK, v1.0. By Phil Reynolds. (See also EGBBXV11.ZIP and EGBBXV12.ZIP).
Disclaimers:
This scenery (including all files within this zip file) is freeware and must not be used in whole or in part for profit. None of the files contained within this zip file may be amended or discarded. If any clarification on these points is required, you should contact the author.
This scenery must not be uploaded to any website for general download without the express permission of the author.
I accept no responsibility for any damage or loss of data incurred due to the installation of this scenery. The scenery has been thoroughly tested by experienced Flight Simulator users and shouldn’t cause any issues, but in today’s legal climate I have to state this for my own sake.
Introduction:
I decided to create this scenery out of a personal necessity, as I was always unhappy with Microsoft’s default version, which is extremely inaccurate. EGBB is my local airport and it seemed a logical place to produce my first FSX compatible scenery.
The scenery has been primarily designed to fit seamlessly with the excellent VFR Photographic Scenery Generation-X from Horizon Simulation Ltd. However, the scenery will also work with just the default FSX product and has been tested to ensure this is the case. I am unsure whether other products will have an effect on my scenery, you will have to try it and see!
Airport Details:
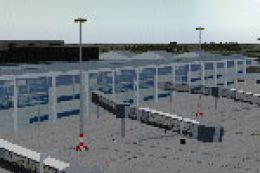
EGBB is currently undergoing a program of improvements to its facilities. My scenery is accurate in terms of airport layout as of January 2008. Recent changes included in my scenery are the new remote stands 20-25 and taxiway C for a quick exit for arriving traffic on runway 15. The “short” runway 06-24 has also recently been officially closed and is now being used as a taxiway. To date, none of the markings or signage have changed and so this runway is still shown in my scenery.
You can find official charts of the airfield on the NATS website. You do need to register to access the site but currently this is a free service.
Compatibility:
This scenery has been designed to work with Flight Simulator X only. I have used several techniques that are FSX specific and do not work in earlier versions of Flight Simulator. It has been tested on installations with both SP1 and SP2 installed and no adverse effects were reported.
Installation:
Please read and follow these instructions carefully, as any mistake will cause problems when using this scenery!
1. Before starting, make sure that FSX is not running.
2. Create a folder to install the main scenery files into (for example, I use C:\FS\Scenery\EGBB, but you can use any folder you wish). I would strongly suggest that this folder is not created within the folder structure of your FSX installation. By doing this, if you ever need to re-install FSX this scenery will not be deleted!
3. In the folder you created in step 1, make a two sub-folders, called Scenery and Texture.
4. Important. Please make sure the Texture sub-folder is named correctly. Lots of users incorrectly name this folder Textures, which causes the scenery textures not to appear in FSX.
5. Unzip the contents of the Scenery.zip file into your Scenery sub-folder.
6. Unzip the contents of the Texture.zip file into your Texture sub-folder.
7. Unzip the contents of the Effects.zip folder into the Effects sub-folder of your FSX installation. For reference, the default installation path for FSX is C:\Program Files\Microsoft Games\Microsoft Flight Simulator X but this will be different if you installed FSX in an alternative location.
8. Unzip the contents of the EffectsTexture.zip file into the Effects/Texture sub-folder of your FSX installation.
9. Start FSX. When the main screen appears click the Settings button on the left of the screen. Then click the Scenery Manager button on the right of the screen.
10. In the Scenery Library, click the Add Area… button on the right of the screen
11. Now browse to your folder that you created in step 2 (In my example it is C:\FS\Scenery\EGBB) and click the OK button
12. You should now see the scenery listed at the top of the Scenery Library with a tick next to it. Just click the OK button and you’re ready to go.
Credits:
I am extremely grateful to the authors of all the following freeware tools enabling me to create this scenery.
Library Creator XML – Arno Gerretsen
ObPlacer XML – Arno Gerretsen
FSX Planner – zBlueSoftware
Whisplacer
FSX_KML – Innova Software
DXPBmp – Martin Wright
GMAX
There are many, many people who have contributed to this scenery and I’m sure I’ll miss one or two out. For this I apologise now!
Gerry Winskill for his hard work in alpha and beta testing, and for planting trees around the airport for me.
Tony Meredith for providing an excellent airport flatten to blend my scenery into the surrounding terrain.
Mike Brook, Alastair McIntyre, John Hill, Tom Smith and Paul Reynolds for all their work in beta testing.
All the people of the various scenery design forums that took the time to answer my design questions.
Free for all simmers · 19 MB · Scanned clean
Download speed: Free tier is capped at 0.5 Mbps (this file takes approximately 5 mins at the cap). PRO members download at full line speed.
This add-on may require the following files to function properly. If this is a repaint, the dependency below is likely the base aircraft package.
FSX\Addon Scenery\ containing scenery and texture sub-folders.readme.txt or README file. It tells you exactly where files go, what dependencies are needed, and any quirks specific to this add-on.Use these coordinates to fly directly to this location once the mod is installed.
52.45390000,-1.74800000
Launch FSX or Prepar3D and use Flights → Load to open the downloaded .pln file. Your aircraft will be positioned at this location.
The archive egbbx10.zip has 8 files and directories contained within it.
This list displays the first 500 files in the package. If the package has more, you will need to download it to view them.
| Filename/Directory | File Date | File Size |
|---|---|---|
| Effects.zip | 01.27.08 | 1.69 kB |
| EffectsTexture.zip | 01.27.08 | 2.39 kB |
| EGBB_PR_ReadMe.pdf | 01.26.08 | 229.63 kB |
| Scenery.zip | 01.27.08 | 727.82 kB |
| Texture.zip | 01.27.08 | 18.10 MB |
| EGBB_PR_ReadMe.txt | 01.27.08 | 5.66 kB |
| flyawaysimulation.txt | 10.29.13 | 959 B |
| Go to Fly Away Simulation.url | 01.22.16 | 52 B |
More FSX & P3D add-ons hand-picked based on this download.
FSX Scenery
Birmingham Int'l Airport UK. This is an update to the scenery of EGBB. Change…
 FSX Scenery
Birmingham Int'l Airport UK. This is an update of the FSX scenery of EGBB. DM…
 FSX Scenery
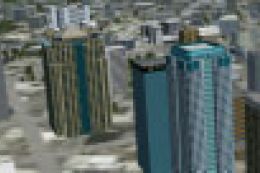
City Of Birmingham. TalonSim is pleased to bring to you City of Birmingham 1.…
 FSX Scenery
City of Birmingham, AL. TalonSim is very excited to bring to you City of Birm…
 FSX Scenery
Birmingham Approach Pylons (EGBB), UK. 612 pylons along the Birmingham Intern…
 FSX Scenery
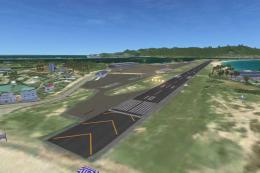
Princess Juliana International Airport (TNCM) in Saint Marteen, Netherlands A…
 FSX Scenery
Barbados International Airport (TBPB). Grantley Adams International Airport f…
 FSX Scenery
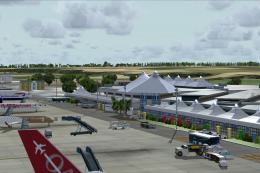
Dubai International Airport (OMDB), Dubai. Includes a new passenger terminal …
Read what other simmers think, or add your own.
FOLLOWED THE INSTRUCTIONS BUT WHEN I LOCATE THE FILE TO ADD TO SCENERY LIBRARY SAYS NO FILES FOUND . I KNOW THERE IN THERE BUT ADD FILE DOESN'T SEE THEM HELP PLEASE
DONT KNOW WHAT I DID BUT ITS THERE NOW